It’s Time to DIY

It’s the perfect time to get those annoying DIY jobs done in and around your home
Hands up who spent the lockdown cracking on with all those niggly DIY jobs?
More likely, between trying to home school the children, do some work and keep yourself busy, more time in the house has simply meant you’ve noticed all those little jobs that need doing even more than usual!
Well, now’s a good time to get some sense of order.
Here’s how to get your home looking and feeling spick and span again.
In the kitchen
- If your cupboard doors don’t hang right, it’s a simple job to fix. Most kitchen doors have adjustable hinges. Open the door and look for the screws which aren’t actually holding the door into the frame – they’re often hidden under a cover. Turning these screws slightly will change the angle at which the door hangs – you might need to have a fiddle with them to get it just right.
- If you have cupboard doors that are chipped, repaint them. First, sand down the small area around the chip to smooth it, then repaint carefully. If the door has several chips it might be easier to sand the whole thing and repaint it. Or if that all feels like too much trouble, refer to our article from the spring issue about kitchen makeovers.
- Deep clean your oven. You can use a special oven cleaner but they’re fairly toxic, and you can get a great effect by simply using bicarbonate of soda and white vinegar. First, in a cold oven, remove the racks. Make a paste from bicarb and water and apply to the baked-on food inside the oven – wear gloves or use a plastic spatula, and do NOT apply to the heating elements. Leave overnight, then wipe with a damp cloth. Next, tip white vinegar into a spray bottle and spray the inside of the oven, then wipe to remove any residue. To clean the racks, sprinkle over some bicarbonate of soda, spray with vinegar until it foams, then submerge in hot water and leave overnight for the dirt to soak off. Alternatively get in touch with David Green at Berkhamsted Oven Cleaning.
 There’s no point cleaning your clothes in a dirty washing machine. If your washing machine doesn’t have a self-clean function, add two cups of white vinegar to the detergent dispenser and run a complete cycle. Run another cycle immediately afterwards on the hottest temperature, adding one cup of bicarbonate of soda to the drum. Afterwards, wipe the drum with a damp cloth. Clean the detergent drawer thoroughly too by removing it and cleaning with normal kitchen cleaner and an old toothbrush.
 Descale the kettle by adding a third of white vinegar and two-thirds water and boil. Leave it for at least 15 minutes after boiling, then tip down the sink and boil with fresh water. If the limescale is particularly stubborn, leave the solution overnight. Remember to clean it before your morning cuppa!
In the bathroom
- One way to give your bathroom a bit of a sparkle is to clean the grouting. It’s time-consuming but will make all the difference. Try a special grout cleaner, or make your own: mix a paste of bicarbonate of soda and water and work into the grout with an old toothbrush (an electric toothbrush will save you loads of time and elbow grease if you can bear to use it for that!). Then fill a spray bottle with white wine vinegar and spray it over the bicarbonate mixture until it starts to bubble. Scrub with the toothbrush and rinse.
- You could also do the same with limescale on shower screens, taps and shower heads to make them sparkle like new!
- Unblock sinks. Hair, skin and dirt builds up over time and can leave your shower and basins blocked. Pour a cup of bicarbonate of soda down the plughole, followed by a cup of white vinegar so it fizzes. Leave a while, then flush down with hot water.
- If you’ve got a leaking tap you could try fixing that too – but it is a little more complicated!
In the Living Room
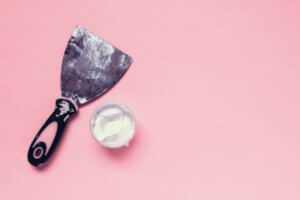
 Cracks in the plaster are common – it’s simply caused by the movement of the house. But fortunately they’re easy to fix. Filler won’t hold in tiny cracks, so first you need to scrape the crack with a scraper to make it a little bigger, then clean off the dust, and fill with polyfilla. Leave it to dry then sand smooth, and paint over it – and voila! A brand new, crack-free wall!
- If the walls are looking a bit grubby with dirty handprints and blobs of grease, you might get away with a good clean rather than a repaint. But make sure you use a gentle detergent so you don’t remove the existing paint. Flash Magic Erasers are fabulous for cleaning practically anything from crayon on the walls to marks on your woodwork.
Outside
 Crumbling mortar between bricks can mean water seeps in and cause them to swell and crack. It can be quite expensive to pay someone else to do it as it’s very time consuming. But the materials don’t cost a lot, so if you have time on your hands, it’s definitely a job you could tackle yourself. Just be careful at the top of the house and make sure you have someone to hold the ladder! Gently remove old mortar with a hammer and chisel, then brush out any remaining dust. Apply fresh mortar into the gaps and leave to dry, then remove any excess with a wire brush.
- After the winter, fascias and soffits can look grubby. To clean them, mix 100ml of washing liquid or powder with 10 litres of warm water, and add a splash of bleach. Make sure your ladder is secure, then dip a sponge in the mixture and work along the surface, wiping as you go. Next, rinse with the hosepipe on a high pressure, then go back over it with a stiff brush, rinsing with water as you go.
For details of local people to help with these jobs, take a look at the Classified section at the back of the magazine or visit the new Local Services Directory on our website.

